A leaking Hot Cold Water Mixing Valve is more than a minor plumbing nuisance. It can waste water, damage cabinets, and make shower temperatures unpredictable. A small drip near the valve may also signal worn seals, loose connections, mineral buildup, or excessive water pressure. The visible leak is often only part of the problem.
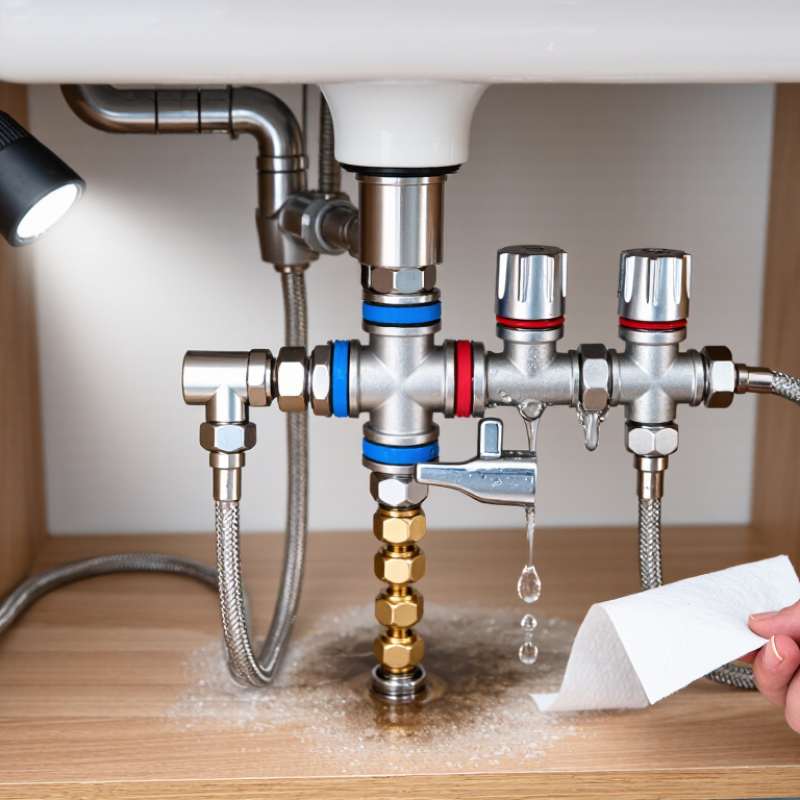
Understanding the valve’s design helps with accurate diagnosis. This component blends hot and cold supplies to deliver a safer, stable outlet temperature. In my experience, the leak may appear around the handle, cartridge, threaded joints, or pressure-balancing mechanism. Each location suggests a different repair path. Do not guess too quickly. Turn off the water supply, dry the area, and watch where the first drop forms. A flashlight and dry tissue can reveal movement that is easy to miss.
Safety matters. Hot water can cause burns, while hidden moisture can weaken wood and encourage mold. Manufacturer instructions should guide any cartridge replacement or adjustment. Local plumbing requirements may also affect installation choices. Some repairs seem simple but become expensive when the wrong seal is fitted. That mistake is common. It is also avoidable.
This guide examines practical causes, inspection steps, and repair considerations for a leaking Hot Cold Water Mixing Valve. It also explains when cleaning may help and when professional service is the more reliable option. Not every leak needs a full replacement. However, ignoring repeated dripping rarely improves the situation. A careful diagnosis saves water, protects surrounding materials, and restores dependable temperature control.
A hot and cold water mixing valve blends two supplies into one controlled water stream. It helps maintain a safer, steadier temperature during use. The valve receives hot water from the heater and cold water from the supply line. Its internal cartridge or thermostatic element adjusts the flow as pressure changes. In a shower, this reduces sudden temperature swings when another tap opens. The component is small, but its job is important.
When the valve leaks, the location often gives the first useful clue. Water around the handle may indicate a worn seal, cartridge, or stem. Water from a connection usually points to a loose fitting or damaged washer.
Shut off both supplies before inspection. Dry the area completely, then watch for the first drop. Do not tighten every fitting blindly. Excess force can damage threads or distort a sealing surface.
In practical maintenance, a mixing valve may seem simple until mineral deposits affect its moving parts. Hard water can leave chalky buildup inside the cartridge. I have found that cleaning the exterior does not prove the interior is healthy. A pressure imbalance can also imitate a valve fault. Check supply pressure, temperature, and nearby joints before replacing parts. A thermometer helps confirm the outlet temperature. Small errors matter here. If the leak continues after basic checks, a qualified plumber should inspect the valve and verify safe water temperatures.
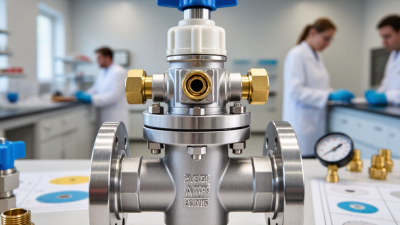
Why Is My Hot Cold Water Mixing Valve Leaking?
A hot and cold water mixing valve usually leaks for a few predictable reasons. The cartridge or internal O-rings may be worn, cracked, or distorted by heat. Mineral scale can scratch sealing surfaces and leave a thin, steady drip. Loose threaded connections may also leak around the valve body. Sometimes, the leak starts after repeated temperature changes. Metal expands when heated and contracts as it cools.
Water pressure can create another problem. Excessive pressure stresses seals, joints, and the valve cartridge. The U.S. Environmental Protection Agency’s WaterSense program reports that household leaks can waste nearly 1 trillion gallons of water nationally each year. It also notes that one in ten homes has leaks wasting more than 90 gallons daily. A small valve drip deserves attention. It is rarely harmless.
Cross-connection inside the valve can make hot and cold water mix incorrectly. Incorrect installation, blocked strainers, or damaged check valves may cause this symptom. ASSE performance standards for thermostatic and pressure-balancing valves emphasize temperature control and backflow protection. Turn off the supply before inspection. Dry the valve, then watch the first wet point carefully. Do not tighten plastic parts aggressively. I have seen this “quick fix” worsen the leak. If pressure seems abnormal, a qualified plumber should test the system and verify the valve’s temperature setting against local plumbing requirements.
| Leak Location or Symptom | Common Cause | Typical Signs | Recommended Inspection | Common Corrective Action | Priority |
|---|---|---|---|---|---|
| Water seeps from the valve body or joint | Loose threaded connection or insufficient sealing | Moisture appears around a threaded fitting, especially when water is flowing or pressure changes. | Dry the area completely, then observe the connection while opening the hot and cold supplies separately if possible. | Shut off the water, depressurize the line, and reseal or tighten the connection according to the valve manufacturer's instructions. Avoid overtightening. | Medium |
| Leak around the cartridge or valve stem | Worn, damaged, or incorrectly seated O-ring or cartridge seal | Water collects around the handle, stem, or cartridge retaining area. The handle may also feel loose. | Remove the handle or access cover only after shutting off the water, then inspect seals for flattening, cracks, or displacement. | Replace the damaged seal or cartridge with a compatible part, clean the sealing surfaces, and reassemble correctly. | Medium |
| Continuous dripping from the outlet or shower head | Internal valve seat, disc, or cartridge is worn or contaminated | Dripping continues after the control is turned off. Mineral deposits or debris may prevent the internal shutoff surfaces from closing fully. | Check whether the supply pressure is normal and inspect the internal control component for debris, scoring, or mineral buildup. | Clean the internal parts when permitted by the design; otherwise replace the worn cartridge, disc assembly, or valve insert. | Medium |
| Leak from the hot or cold inlet connection | Damaged washer, compression seal, fitting, or supply tube | Water is visible at one inlet rather than at the central mixing section. The leak may increase when that supply is opened. | Dry both inlet connections and check each one independently. Look for damaged threads, a split washer, corrosion, or a distorted compression ring. | Replace the failed washer, seal, fitting, or supply tube. Use the correct sealing method for the connection type. | Medium |
| Leak at a soldered or brazed joint | Poor joint, corrosion, thermal movement, or a cracked connection | Moisture originates from a fixed pipe joint and may leave green, white, or brown corrosion deposits on metal components. | Inspect the full joint circumference after drying. Check for corrosion, movement, heat damage, and signs of previous repair work. | Isolate the water supply and have the joint properly repaired or replaced. Do not apply sealant over an active structural leak. | High |
| Leak from a cracked valve housing | Freeze damage, corrosion, manufacturing defect, impact, or excessive tightening | A visible split or hairline crack remains wet even after nearby fittings are dried. | Inspect the housing under good lighting and check whether water emerges directly from the crack rather than from a serviceable seal. | Replace the complete valve body or assembly. A cracked pressure-containing body should not be treated as a minor seal problem. | High |
| Leak occurs only when hot water is used | Thermal expansion exposing a weak seal or joint | The valve is dry when cold but leaks after the hot supply runs. The leak may stop as the assembly cools. | Observe the valve during a hot-water cycle and inspect seals and joints for movement or changes in the leak rate. | Repair the failed seal or joint and confirm that the hot-water temperature and system pressure are within safe limits. | Medium |
| Leak becomes worse when the handle is moved | Damaged stem seal, loose packing, or worn control mechanism | Water appears around the operating stem or handle during adjustment rather than when the valve is stationary. | Move the control slowly while watching the stem area. Do not force a stiff handle, as excessive force can damage the valve. | Replace the stem seal or cartridge, or service the control mechanism if the valve design allows it. | Medium |
| Leak is accompanied by unstable water temperature | Faulty mixing cartridge, blocked strainer, incorrect pressure balance, or cross-connection | Temperature fluctuates between hot and cold, flow from one side is weak, or hot water migrates into the cold line. | Check inlet screens, supply pressure, shutoff valves, and the internal cartridge. Confirm that hot and cold connections are correctly oriented. | Clean blocked screens, correct the connections, or replace the defective cartridge. A qualified professional may be needed for pressure or piping faults. | Medium |
| Water is pooling below the valve but the valve appears dry | Leak from an upstream pipe, concealed fitting, or condensation mistaken for a valve leak | The floor or cabinet is wet, but the valve body does not show a clear point of origin. | Dry the entire area, place a clean paper towel beneath each connection, and inspect upstream pipework during water use. | Repair the actual source and dry the surrounding materials promptly to reduce the risk of corrosion, mold, and water damage. | High |
| Leak is rapid, spraying, or cannot be stopped | Major fitting failure, ruptured pipe, or failed shutoff component | Water flow is strong, the leak spreads quickly, or the local shutoff does not stop the water. | Do not disassemble the valve while it is pressurized. Locate the nearest main or branch shutoff if the local valve fails. | Turn off the water supply immediately, protect nearby electrical equipment, and contact a qualified plumbing professional. | High |
Safety note: Always isolate the hot and cold water supplies before removing a cartridge, seal, fitting, or valve component. Check for hidden water damage and verify that the repaired valve is leak-free under normal operating pressure.
Why Is My Hot Cold Water Mixing Valve Leaking?
How to Identify the Source of the Mixing Valve Leak
A mixing valve leak can appear confusing because water travels along pipes and fittings. Start by turning off the hot and cold water supplies. Dry the valve completely with a clean cloth. Then open the valve briefly and watch the first wet spot appear. Do not rely on the lowest drip point.
Check the valve body, threaded connections, union nuts, and temperature adjustment stem. Water around a connection may indicate a worn washer or loose fitting. Moisture around the stem often points to a damaged seal or cartridge. A leak from the valve body itself can suggest internal corrosion or a cracked housing. Look closely.
Condensation can imitate a leak, especially in humid rooms. Wipe the surface and monitor it for several minutes. A paper towel wrapped around each joint can reveal the exact source. I once blamed the valve body too quickly. The actual problem was a small connection above it. That mistake showed me why careful drying matters.
Also inspect nearby pipes, wall surfaces, and cabinet floors for hidden moisture. A spreading stain may indicate a concealed leak rather than a valve failure. If water reaches electrical equipment, stop testing immediately. Persistent leakage, unstable temperature, or a scalding outlet requires assessment by a qualified plumbing professional. Safety can be easy to underestimate.
Temperature readings can help identify a mixing valve problem. Hot water storage is commonly maintained at about 60°C, cold water should remain below 20°C, and a comfortable mixed outlet is typically around 38–43°C.
If the mixed outlet temperature rises close to the hot inlet temperature, the thermostatic cartridge or internal seal may be failing. If water appears around the threaded connections, unions, or valve stem, the leak is more likely caused by a loose fitting, worn gasket, or damaged stem seal.
A leaking hot-cold mixing valve often drips from its stem, joints, or internal cartridge. Mineral deposits can stop seals from closing properly. Before touching the valve, shut off both water supplies and open a nearby faucet. Place a towel and shallow bowl underneath. Hot water can burn skin.
Remove the handle, cover, and retaining nut carefully. Photograph each part before removal. This small step prevents confusion later. Inspect the cartridge, O-rings, washers, and valve seat for cracks or hardened rubber. Clean light scale with a suitable cloth, then install matching replacement seals. Apply approved silicone grease sparingly to O-rings. Do not force the cartridge into place. A damaged seal may look usable but still leak under pressure.
If the valve body is cracked, badly corroded, or leaking around fixed connections, replacement is usually safer than repeated repairs. Match the new valve to the pipe size, connection type, temperature range, and flow direction. I have found that rushing this check creates more work later. Tighten threaded joints firmly, but avoid excessive force, especially on older pipes. Restore the water slowly and check every connection with a dry tissue. Test several hot and cold settings, then confirm the water temperature remains stable. If the valve is hidden inside a wall, or the leak continues after new seals, consult a qualified plumber.
Why Is My Hot Cold Water Mixing Valve Leaking?
A leaking hot-cold mixing valve can leave a damp ring beneath the handle. You may also notice temperature swings, dripping, or a faint metallic sound inside the wall. A worn cartridge, loose connection, damaged seal, or excessive water pressure can cause these symptoms. However, identifying the exact fault often requires more than tightening a nut.
Call a professional plumber when water enters the wall, the valve controls scald protection, or the leak continues after basic shutoff. Hidden moisture can damage framing and encourage mold growth. The U.S. Environmental Protection Agency’s WaterSense report estimates household leaks waste more than 10,000 gallons yearly. Some homes lose over 90 gallons daily. Small leaks deserve attention. A licensed plumber can test pressure, isolate hot and cold lines, and verify safe outlet temperature. Guesswork can create burns or conceal a larger pipe failure.
Tips: Turn off the supply before inspection. Dry the valve with a towel, then watch for fresh drops. Do not force a corroded handle. Take a clear photo and note when the leak appears. I have seen homeowners replace a seal when the real problem was pipe movement. That mistake is easy to make. If the valve sits behind tile or drywall, professional access usually prevents unnecessary damage.