
A damaged threaded hole can turn a routine repair into a frustrating job. A Thread Fix Kit can restore usable threads, but the right kit depends on the hole, fastener, and material. Kits may include a drill bit, tap, installation tool, and thread inserts. Check that the kit matches the fastener’s diameter and pitch; a small mismatch matters.
Before starting, read the kit instructions and the equipment maker’s guidance. Secure the part, protect nearby components, and wear suitable eye protection. Keep the work area clean. Metal chips are small, but they can cause trouble. Good preparation is less exciting than the repair itself, yet it often makes the difference.
Most kits follow a clear sequence: prepare the damaged hole, cut new threads with the supplied tap, then install an insert. Use the specified tools and keep the tap aligned with the original hole. Work steadily rather than forcing it. If the tool binds, stop and check the alignment and instructions. This is not a place to guess.
The process looks simple on paper. In practice, keeping everything square can take patience. After installation, check that the insert sits as directed and test the fastener gently. Do not treat one successful turn as proof of a sound repair. This guide explains what to check, how the steps fit together, and where extra care is worthwhile. Some jobs still call for a qualified repair technician.
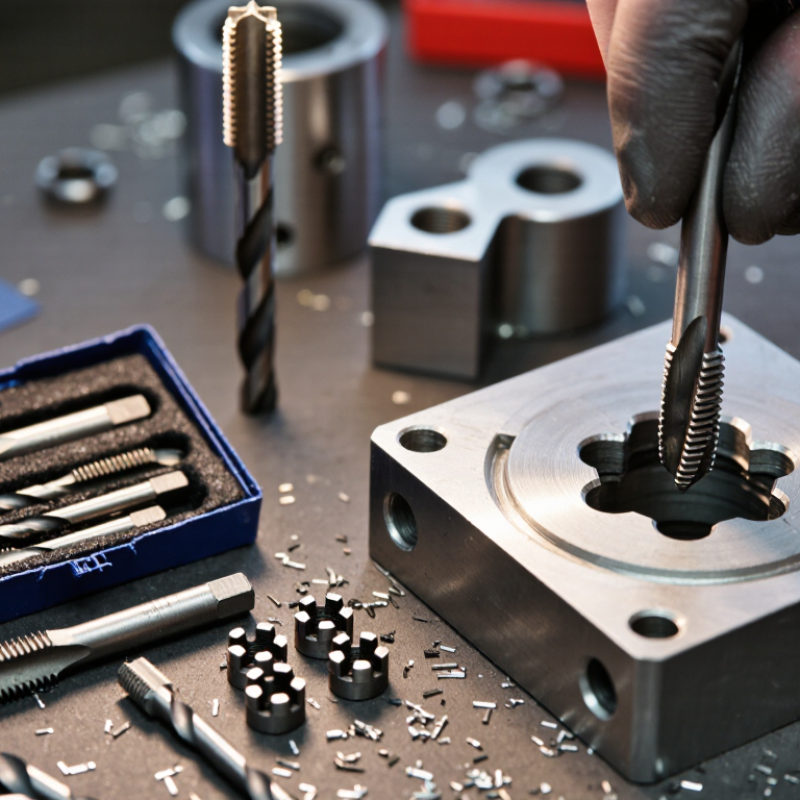
Before choosing a thread repair kit, inspect the damaged hole under a bright light. Remove loose debris and oil, then check whether the threads are stripped, crossed, or merely dirty. A small flashlight helps reveal flattened ridges near the opening. Don’t force a bolt into the hole; it can worsen the damage. A careful look matters.
Identify the original thread size and pitch with a thread gauge, and confirm whether the thread is metric or inch-based. Check the fastener’s diameter and pitch rather than relying on its appearance. Then measure the usable hole depth, especially if it is blind. The replacement insert must fit without bottoming out, and the tap supplied with a kit needs enough clearance to cut correctly. Note the surrounding material, too: aluminum and steel may call for different drilling pressure and handling.
Match the kit to those details, including insert length, thread standard, and intended base material. If the hole is badly oval, cracked, or close to an edge, a simple insert may not hold securely; get a qualified mechanic’s assessment. I’ve seen rushed repairs turn a small thread problem into a larger one. It is easy to miss one measurement. Check twice, and compare the kit’s stated dimensions with the fastener before drilling.
Clear the bench and give the workpiece solid support. Remove nearby parts that could catch metal chips, then wipe away oil and dirt so the damaged hole is easy to inspect. Wear safety glasses; small chips can travel farther than expected. Clamp the part firmly, but avoid crushing soft material. A steady setup matters. Check the thread-fix kit instructions for the specified drill size and drilling depth, since these vary by repair system and fastener. Mark the hole’s center with a center punch if the opening is uneven. It is tempting to rush this step, but a wandering drill can make the repair unreliable.
Fit the correct drill bit and, where practical, use a depth stop to avoid drilling too far. Hold the drill square to the surface, using a drill guide if alignment is difficult. Start slowly, apply light, even pressure, and clear chips often; use cutting fluid only when suitable for the workpiece material. Do not force a hot or binding bit. Pause and check the hole’s alignment and depth against the kit guidance. A slightly crooked hole is easy to miss from above. Once drilling is complete, remove loose chips and inspect the opening before moving on to thread preparation.
A thread-fix kit’s tapping tool cuts a new, larger thread so a repair insert can sit securely in a damaged hole. The tap does not usually restore the original thread by itself.
Check the kit instructions for the correct drill size, tap, and insert; these can vary.
Wear eye protection and clamp the part firmly before drilling or tapping.
Keep the tap straight against the hole. A crooked start can leave the insert misaligned. Fit the tap wrench, then turn the tool slowly by hand, following the kit’s specified direction.
Go slowly. After a short turn, reverse slightly to break up chips, then continue. Use cutting fluid only if the instructions suit the part’s material.
If the tap binds, stop and check alignment rather than forcing it. Chips matter. Clear them as directed, and avoid blowing debris toward your face.
When the new threads reach the required depth, back the tap out carefully and clean the hole before fitting the insert.
It is tempting to rush this step, especially on a small repair, but a rough thread can make the insert difficult to seat.
Recheck the finished thread and insert position before reinstalling the fastener.
The supplied driver is designed to guide the thread insert into the prepared hole without twisting it out of shape. Check the kit instructions for the correct insert size and driver setup. Clean away loose chips, then make sure the hole is free of oil and debris. A clean fit matters. Hold the driver straight to the hole, and engage the insert’s drive feature as shown in the kit instructions. Keep the insert aligned with the opening; even a slight tilt can cause uneven engagement.
Turn the driver steadily in the direction specified by the kit, using light, consistent pressure. Do not force a stuck insert. Back it out carefully and check for misalignment or debris before trying again. Stop when the insert reaches the specified depth, usually just below or level with the surface, depending on its design. Small details count. Avoid striking the driver unless the instructions specifically call for it. After installation, remove the driver and inspect the first thread under good light. I’ve found this final check easy to rush, but a crooked or proud insert can interfere with the fastener. Follow the kit’s depth guidance for the material and application.
The bars show the order of the installation steps, not time or effort. Follow the kit instructions for the correct hole preparation and insert depth.
How to Use a Thread Fix Kit?
After installing the thread repair, inspect the area before fitting the fastener. Use a bright light to check that the insert sits evenly and does not protrude from the surface. Look for loose metal fragments, damaged threads, or debris around the opening. Clean the area with a suitable brush or cloth. Small flaws can be easy to miss.
Tips: Start the fastener by hand. It should turn smoothly for several rotations. If it binds, stop and check the alignment rather than forcing it. Once it seats correctly, tighten it gradually with the specified tool and torque setting. Avoid overtightening; that can damage the repaired threads or the surrounding material. A snug fit matters.
Test the repair under normal working conditions, then check the fastener again for movement or looseness. Follow the kit and equipment instructions, since curing times and torque requirements can vary. If the fastener still wobbles, feels rough, or will not hold securely, do not rely on it under load. Reinspect the repair. I might be tempted to call a slightly uneven insert good enough, but that is a poor shortcut. A careful second check is worth the extra minute.
| Check | How to Inspect or Test | A Good Result | If It Does Not Pass |
|---|---|---|---|
| Repair insert position | Check the insert against the surface and the kit instructions. Use a light and, where appropriate, a depth gauge. | The insert is seated at the specified depth and does not interfere with the mating part. | Do not force the fastener. Recheck the installation steps and correct the insert position if the kit allows. |
| Thread cleanliness | Inspect the repaired threads and nearby area for swarf, dirt, or loose material; clean using a method suitable for the component. | Threads are visibly clean, with no debris that could obstruct the fastener or enter the assembly. | Remove debris before testing. Keep contaminants out of blind holes and sensitive assemblies. |
| Fastener match | Confirm the fastener’s nominal diameter, thread pitch, length, and material are suitable for the application and repair insert. | The fastener matches the specified thread and engages without binding. | Stop and verify the thread specification. Do not use a mismatched fastener to test the repair. |
| Hand-start test | Start the fastener by hand for several turns before using a tool. Keep it aligned with the repaired hole. | The fastener turns smoothly by hand without cross-threading, sudden resistance, or wobble. | Back the fastener out and check alignment, thread match, and insert condition. Never force it into the hole. |
| Engagement and fit | Install the intended mating part or washer, if applicable, and check that the fastener clamps the joint as designed. | The parts seat correctly, and the fastener has adequate thread engagement for the application. | Check fastener length, seating surfaces, and application requirements before proceeding. |
| Torque check | If a torque value is specified for the assembly, tighten with a calibrated torque wrench and follow the relevant service or engineering instructions. | The fastener reaches the specified torque without the insert moving or the threads showing signs of failure. | Stop if the insert rotates, the fastener continues to turn without tightening, or resistance changes unexpectedly. Do not guess a torque value. |
| Final inspection | After tightening, visually check the joint and confirm the fastener remains seated. Recheck only as directed by the equipment or repair instructions. | The joint is secure, the insert remains in place, and there are no visible signs of damage or loosening. | Do not return the assembly to service until the cause is identified and the repair is confirmed suitable. |
